Friday, August 21, 2009

Poulet en Papillote

Good Day my fellow food lovers! First off, as you may already know - Sarah and I WON the Capitol Iron Chef Peoples Choice Award! We had an absolute blast, really we did. It was a blazing 95 degrees, we were outside, and we were mashed between a 4 foot tailgate grill and a bunsen burner...whew! It was amazing. The day went perfect, I was VERY happy with what we created...another one for the books!

Today, I will be discussing my 'Adventures in Papilotte'. For dinner last night I made, Poulet de Papilotte along side pan seared Bok Choy & Red Bell Peppers. It started out like this....


Here we have a recipe for 2 people:
~ Olive Oil
~ White Wine
~ Lemon Juice
~ one Brown Russet Potato, or about 3 small red potatoes
~ half of an Onion,
~ one minced Shallot, if you don't have a shallot - use a garlic clove (I just prefer shallots)
~ 2 sprigs of Fresh Thyme (OR - you can use oregano or rosemary, whatever you fancy)
~ 2 breasts of chicken, (OR you can use 2 filets of fish)
~ Preheat over to 400 degrees

...side note on Fresh Herbs VS. Dried Herbs. Sometimes it makes more sense to use dried herbs, primarily due to cost and minimalizing waste. Theoretically, dried herbs are more potent and concentrated than fresh herbs. A good rule of thumb is to use 1 teaspoon of dried herbs, per Tablespoon of Fresh. For this recipe I used two sprigs of thyme, if you are using dried thyme - use approximately 1/3 teaspoon (which is close to the equivalent of 2 sprigs fresh).

First thing we need to do is, create flavor. What's better than an infused oil to create flavor?
Over LOW heat, add about 3-4 Tablespoons of Olive Oil. Then add your minced shallot and 2 sprigs of Fresh Thyme (or 1/3 tsp of dried). Simmer over low until flavors are infused - about 5-7 minutes. At this point I splashed in about a Tablespoon of White Wine and about a Tablespoon of Lemon Juice, remove from heat - set aside.


Next, slice up your potato and onion - add to a medium size bowl. Pour half of your infused oil over top, and toss.


Now we are ready for the 'papilotte'. As far as the 'papilotte' is concerned, your options are endless. The intent is to SEAL the package to prevent the moisture from escaping - therefore creating a VERY juicy piece of chicken or fish. With that being said, one could make a pocket out of Parchment Paper, Aluminum Foil, or even a brown paper bag.

For my adventure, I used Parchment Paper. Tear off 2 pieces of parchment paper; 10 inch squares. Next, divide your your potato/onion mixture in half and place in the center of each paper square. Then top with your choice of chicken or fish. Pour the remaining infused oil over top, salt and pepper ...


Next, seal the package. This is much like wrapping a present:


I chose to create an envelope, and ultimately wished I had made a triangle pocket.
Once I closed my package, I didn't think it had a good seal - so I flipped it over to create a seal on the bottom, which worked fine...but a triangle pocket would have worked much better. With a triangle pocket you can roll the edges to create a tight seal.

Place your pockets on a cookie sheet and pop in the oven (that you've preheated to 400 degrees). For CHICKEN Bake for 25-30 minutes. For FISH preheat to the same, baking for only 15 minutes.

And Wah Lah... (be careful opening pockets, as the steam will be VERY hot)


I served mine with Pan seared Bok Choy, Red Bell Peppers and Garlic:


In closing, I would definitely make this again - it was really easy to make and really easy to clean up. I think if I made this recipe with Fish (Poisson en Papilotte) instead of Chicken, I would make it without the potatoes inside the pocket. Maybe with a rice pilaf on the side instead. One could throw bell pepper strips, squash or zuchinni inside the pocket as well. YUM! These pockets are light, healthy, and perfect for making individual portions.

Until next time....

Monday, August 10, 2009

Pizza Crust

Our Sunday started out as a "Reuben Sunday", as you already know...I'm in L-O-V-E with the Reuben Sandwich. As for the rest of the afternoon...

Originally we had plans to go hiking in Fayetteville, and then visit the famous Pies n Pints. Slim and I have not yet partaken in the goodness that we've come to understand that this place holds. Instead, we decided to make our own pizza. We've done this before, but we've never made our OWN crust. I started in on my research, which is typically where you will find me prior to a grocery trip. For me, I start with foodtv.com (read all of the comments about a recipe, so far they are 99% true), I usually end up in google images and on youtube. These aren't the only places that I look, however this will get you started with a good base recipe. After a little research, I decided to kick it up and GRILL the pizzas. I soon had visions of pizza dough seeping through the grate of our grill.

Let's start with the recipe (I modified the original recipe from research, making it, and based on the ingredients I already had in the house).


Pizza Dough ~ Makes 4 (10-inch) Pizzas
2/3 cup lukewarm Water
1 Packet of Active Dry Yeast

1/2 teaspoon Sugar
2 Tablespoons Olive Oil, plus additional for oiling bowl
2 cups All Purpose Flour

1/4 cup Jiffy Cornbread Mix

~ Note here: the original recipe calls for cornmeal, you will NEVER use cornmeal enough to buy an entire sack of it - just by a box of Jiffy cornbread mix. I keep several boxes in the house...my Nana always did.
2 teaspoons coarse salt

In a Large Bowl stir together 1/3 cup water, yeast, and sugar -
let stand til foamy, about 10 minutes.


Stir in the remaining 1/3 cup water, 2 Tablespoons Olive Oil, 1 3/4 cups flour, corn meal and salt blend until the mixture forms a dough. Knead dough on a floured surface, incorporating the remaining 1/4 cup flour, to prevent dough from sticking, until smooth - about 5 to 10 minutes. Form the dough into a ball.


Wash and dry the bowl you used to mix the dough, lightly oil the sides and bottom of the bowl with Olive Oil. Add the dough, turn to coat in the oil, cover and let rise in a warm place (your
counter top will do just fine), until doubled in size - about 1 hour.

Before:


After:


Gently punch the dough down and divide into 4 equal pieces. Roll each piece on a lightly floured surface into a 10-inch circle that is about 1/8th of an inch thick. At this point I pulled out a sheet of plastic wrap and lined a cookie sheet. I took the rolled out pizza dough, placed it in the middle of the plastic wrap and folded the sides over to seal. Then repeated the process, thus ending up with individually wrapped stacked pizza doughs. Refrigerate your stack of doughs for about 20 minutes, or until you are ready to grill.


I took advantage of the hour I had while I was waiting for the dough to rise, and prepared my toppings... I made two different kinds of pizza:
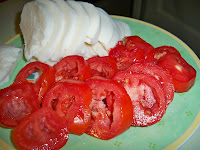
Chicken, Bacon, Ranch & Tomato, Mozzarella, Basil, Balsamic Drizzle


And we are READY TO GRILL...


Now, this is where I got a little anxious about the dough seeping through. Don't be afraid, it WON'T seep through...that would have been funny though. Bring your stack of wrapped doughs out to the grill, as a matter of fact, you probably want to bring all of your toppings to the grill - you'll need them at hand.

Spray your grill down with Pam Grilling Spray, then preheat the grill on LOW. Throw on all four pizza dough rounds, if you can fit them.


I kept my spatula handy so that I could peek under the crusts, to make sure they weren't burning. This really reminded me of pancakes, once they start to bubble on top, they are about ready to flip. Flip 'em over and you are ready for the toppings.


Now that your pizzas are topped, TURN OFF THE GRILL AND CLOSE THE LID.
Leave the lid closed for about 5-10 minutes, this will give everything a chance to
heat through and melt the cheese. Grab your cookie sheets, you'll need 2.

Slide the pizzas off the grill and onto your cookie sheets. Finish topping with any remaining ingredients, cut into slices and SERVE.

Wah Lah!


I highly recommend making your OWN pizza crust, it was completely worth it. And really, not that hard at all.
Not to mention that it was WICKED yummee!


Next time on Urban Dive...

Join me in my adventures of what I will call "Pocket Cooking".
I will be exploring Papillotes de Poisson AND Papillotes de Poulet.