Friday, August 21, 2009

Poulet en Papillote

Good Day my fellow food lovers! First off, as you may already know - Sarah and I WON the Capitol Iron Chef Peoples Choice Award! We had an absolute blast, really we did. It was a blazing 95 degrees, we were outside, and we were mashed between a 4 foot tailgate grill and a bunsen burner...whew! It was amazing. The day went perfect, I was VERY happy with what we created...another one for the books!

Today, I will be discussing my 'Adventures in Papilotte'. For dinner last night I made, Poulet de Papilotte along side pan seared Bok Choy & Red Bell Peppers. It started out like this....


Here we have a recipe for 2 people:
~ Olive Oil
~ White Wine
~ Lemon Juice
~ one Brown Russet Potato, or about 3 small red potatoes
~ half of an Onion,
~ one minced Shallot, if you don't have a shallot - use a garlic clove (I just prefer shallots)
~ 2 sprigs of Fresh Thyme (OR - you can use oregano or rosemary, whatever you fancy)
~ 2 breasts of chicken, (OR you can use 2 filets of fish)
~ Preheat over to 400 degrees

...side note on Fresh Herbs VS. Dried Herbs. Sometimes it makes more sense to use dried herbs, primarily due to cost and minimalizing waste. Theoretically, dried herbs are more potent and concentrated than fresh herbs. A good rule of thumb is to use 1 teaspoon of dried herbs, per Tablespoon of Fresh. For this recipe I used two sprigs of thyme, if you are using dried thyme - use approximately 1/3 teaspoon (which is close to the equivalent of 2 sprigs fresh).

First thing we need to do is, create flavor. What's better than an infused oil to create flavor?
Over LOW heat, add about 3-4 Tablespoons of Olive Oil. Then add your minced shallot and 2 sprigs of Fresh Thyme (or 1/3 tsp of dried). Simmer over low until flavors are infused - about 5-7 minutes. At this point I splashed in about a Tablespoon of White Wine and about a Tablespoon of Lemon Juice, remove from heat - set aside.


Next, slice up your potato and onion - add to a medium size bowl. Pour half of your infused oil over top, and toss.


Now we are ready for the 'papilotte'. As far as the 'papilotte' is concerned, your options are endless. The intent is to SEAL the package to prevent the moisture from escaping - therefore creating a VERY juicy piece of chicken or fish. With that being said, one could make a pocket out of Parchment Paper, Aluminum Foil, or even a brown paper bag.

For my adventure, I used Parchment Paper. Tear off 2 pieces of parchment paper; 10 inch squares. Next, divide your your potato/onion mixture in half and place in the center of each paper square. Then top with your choice of chicken or fish. Pour the remaining infused oil over top, salt and pepper ...


Next, seal the package. This is much like wrapping a present:


I chose to create an envelope, and ultimately wished I had made a triangle pocket.
Once I closed my package, I didn't think it had a good seal - so I flipped it over to create a seal on the bottom, which worked fine...but a triangle pocket would have worked much better. With a triangle pocket you can roll the edges to create a tight seal.

Place your pockets on a cookie sheet and pop in the oven (that you've preheated to 400 degrees). For CHICKEN Bake for 25-30 minutes. For FISH preheat to the same, baking for only 15 minutes.

And Wah Lah... (be careful opening pockets, as the steam will be VERY hot)


I served mine with Pan seared Bok Choy, Red Bell Peppers and Garlic:


In closing, I would definitely make this again - it was really easy to make and really easy to clean up. I think if I made this recipe with Fish (Poisson en Papilotte) instead of Chicken, I would make it without the potatoes inside the pocket. Maybe with a rice pilaf on the side instead. One could throw bell pepper strips, squash or zuchinni inside the pocket as well. YUM! These pockets are light, healthy, and perfect for making individual portions.

Until next time....

Monday, August 10, 2009

Pizza Crust

Our Sunday started out as a "Reuben Sunday", as you already know...I'm in L-O-V-E with the Reuben Sandwich. As for the rest of the afternoon...

Originally we had plans to go hiking in Fayetteville, and then visit the famous Pies n Pints. Slim and I have not yet partaken in the goodness that we've come to understand that this place holds. Instead, we decided to make our own pizza. We've done this before, but we've never made our OWN crust. I started in on my research, which is typically where you will find me prior to a grocery trip. For me, I start with foodtv.com (read all of the comments about a recipe, so far they are 99% true), I usually end up in google images and on youtube. These aren't the only places that I look, however this will get you started with a good base recipe. After a little research, I decided to kick it up and GRILL the pizzas. I soon had visions of pizza dough seeping through the grate of our grill.

Let's start with the recipe (I modified the original recipe from research, making it, and based on the ingredients I already had in the house).


Pizza Dough ~ Makes 4 (10-inch) Pizzas
2/3 cup lukewarm Water
1 Packet of Active Dry Yeast

1/2 teaspoon Sugar
2 Tablespoons Olive Oil, plus additional for oiling bowl
2 cups All Purpose Flour

1/4 cup Jiffy Cornbread Mix

~ Note here: the original recipe calls for cornmeal, you will NEVER use cornmeal enough to buy an entire sack of it - just by a box of Jiffy cornbread mix. I keep several boxes in the house...my Nana always did.
2 teaspoons coarse salt

In a Large Bowl stir together 1/3 cup water, yeast, and sugar -
let stand til foamy, about 10 minutes.


Stir in the remaining 1/3 cup water, 2 Tablespoons Olive Oil, 1 3/4 cups flour, corn meal and salt blend until the mixture forms a dough. Knead dough on a floured surface, incorporating the remaining 1/4 cup flour, to prevent dough from sticking, until smooth - about 5 to 10 minutes. Form the dough into a ball.


Wash and dry the bowl you used to mix the dough, lightly oil the sides and bottom of the bowl with Olive Oil. Add the dough, turn to coat in the oil, cover and let rise in a warm place (your
counter top will do just fine), until doubled in size - about 1 hour.

Before:


After:


Gently punch the dough down and divide into 4 equal pieces. Roll each piece on a lightly floured surface into a 10-inch circle that is about 1/8th of an inch thick. At this point I pulled out a sheet of plastic wrap and lined a cookie sheet. I took the rolled out pizza dough, placed it in the middle of the plastic wrap and folded the sides over to seal. Then repeated the process, thus ending up with individually wrapped stacked pizza doughs. Refrigerate your stack of doughs for about 20 minutes, or until you are ready to grill.


I took advantage of the hour I had while I was waiting for the dough to rise, and prepared my toppings... I made two different kinds of pizza:
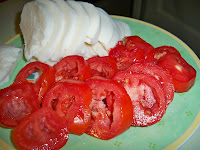
Chicken, Bacon, Ranch & Tomato, Mozzarella, Basil, Balsamic Drizzle


And we are READY TO GRILL...


Now, this is where I got a little anxious about the dough seeping through. Don't be afraid, it WON'T seep through...that would have been funny though. Bring your stack of wrapped doughs out to the grill, as a matter of fact, you probably want to bring all of your toppings to the grill - you'll need them at hand.

Spray your grill down with Pam Grilling Spray, then preheat the grill on LOW. Throw on all four pizza dough rounds, if you can fit them.


I kept my spatula handy so that I could peek under the crusts, to make sure they weren't burning. This really reminded me of pancakes, once they start to bubble on top, they are about ready to flip. Flip 'em over and you are ready for the toppings.


Now that your pizzas are topped, TURN OFF THE GRILL AND CLOSE THE LID.
Leave the lid closed for about 5-10 minutes, this will give everything a chance to
heat through and melt the cheese. Grab your cookie sheets, you'll need 2.

Slide the pizzas off the grill and onto your cookie sheets. Finish topping with any remaining ingredients, cut into slices and SERVE.

Wah Lah!


I highly recommend making your OWN pizza crust, it was completely worth it. And really, not that hard at all.
Not to mention that it was WICKED yummee!


Next time on Urban Dive...

Join me in my adventures of what I will call "Pocket Cooking".
I will be exploring Papillotes de Poisson AND Papillotes de Poulet.

Wednesday, July 15, 2009

Capitol Cast Iron Chef Battle

Good Day my fellow food lovers! I've been on holiday for the last three weeks....I apologize for neglecting you. Boston, the Beach and family consumed us completely.


Capitol Cast Iron Chef Battle

Saturday, August 15, 2009


Summer is well on its way...and the heat is on! Especially in the competition realm....I've entered the Capitol Cast Iron Chef Battle, coming up on August 15th. Ten Local Chef's will put their best to the test! After receiving the secret ingredient, $30.00 and 30 minutes - Chef's will scurry through the market selecting their ingredients. Chef's will have 2 hours to battle; presenting 2 amazing dishes.


10-10:30 Purchase Ingredients

10:30-12:30 Market Battle

12:30 Presentation to Judges

12:30-1:30 Public Tastings

2:00 Prizes will be awarded for Peoples Choice & Market Iron Chef


My partner in crime is Sarah Plumley - most have seen us in the kitchen together, it's a beautiful thing. Sarah and I spend a lot of our time talking about food, passing recipes, drinking wine, restaurant dreaming, and creating dishes for our friends...it was only natural to have Sarah at my side for this competition as my Sous Chef.


The only thing that makes this EVEN more exciting, is that MY Chef Instructor - Executive Chef, Bill Dodson of the acclaimed Cooking and Culinary Institute and MCTC....has entered the competition as well. I received a text from Bill the other day, "I just signed up to compete on the 15th at the market! It's on!!!!!" Oh...it's on alright....I just hope you're ready Bill. Ready to tell the other students that E Blackhurst, one of your students, beat you! Just kidding....kind of. At his side will be Chris Bugher, Head Banquet Chef at the Cooking and Culinary Institute.


I hope you all will come out - mainly to have fun,

and also to give a BIG wOOt wOOt for E & Sarah!

At least come out to see us work under pressure,

and eat our food!


Wednesday, June 17, 2009

Buffalo-Chicken Sammies

Good Morning my fellow food lovers, today's special is.....Buffalo Chicken Sammies with Pimento Stuffed Green Olives.....
I think I'll show you a picture, give you the recipe and let you decide for yourself:


2 Chicken Breasts, Shliced*
1 Tablespoon Oil, olive or peanut - your preference
2 or 3 - 6" Hoagie buns, I used baguettes**
1/4 cup Mayo
1 Heaping Tablespoon of Sour Cream
1/4 cup Franks Hot Wing Sauce
2 or 3 Tablespoons Bleu Cheese Crumbles
5 Pimento Stuffed Green Olives, sliced thin

Heat your pan on med-low, once hot - add about a
Tablespoon of oil
Add your Shliced Chicken and Sautee til slightly browned
(Season your chicken, salt and pepper will do)
In a separate bowl for the sauce, combine: Mayo, Sour Cream, Hot Wing Sauce and Bleu Cheese Crumbles, mix it with a spoon
Slice Green Olives thin, set aside
Toast your roll slightly

Assembly - Slice your roll on the side, stuff it full with Shliced Chicken, spoon a liberal amount of sauce over the chicken, top with sliced Green Olives.
Serves 2


*Shliced: This is the word I've come up with for slice-shaving, much like how chicken is prepared asian style. Ready.....Cutting board, damp squeezed-out kitchen towel flat underneath (so the board won't skirt around on ya). The following is from a "righty" perspective, so if you are a lefty, reverse.

Lay the Chicken Breast, shiny plump side up, on your board. Looking down at the breast, you want the thick side on your right, and the skinny-pointed end on your left. Warning, my next statement involves touching raw chicken.....I TOUCH my food. Grab a hold with your left hand, turn your Chef's knife (the big one) at an angle, angling away from you... and Shlice on the bias, starting with the thick end. What you are going for? This should look much like old-timey shaving with a blade, the part where they sharpen the blade on a leather strap. The strap representing the Chicken breast, and the blade of course representing your chef's knife. Your chicken will end up thin and shaved. It will A, cook faster, B have more surface area to season, C the texture is much nicer. I'm a huge texture person, I want my food to taste good and feel good in my mouth.

**Note on Baguettes, buy them when you go to the grocery store - cut them into 6" pieces, shove'em in freezer bags and keep them on hand. When you need some bread, pull a couple out of the freezer and throw it in the toaster oven, or oven @ about 200 degrees for a couple minutes until defrosted. (It's like pretend fresh baked bread) I use them for toast with breakfast, garlic bread with dinner, sandwiches...whatever you need bread for. No waste, single serving, on hand, hot bread.

E

Monday, June 15, 2009

Reuben Sundays

Good Morning Sunshine! Finally the sun has decided to make an appearance, and will be sticking around at least until midweek. Nice change from "London".

For some reason, I really enjoy a Reuben on Sundays. I thought I might devote this mornings Blog to the "Reuben Sandwich".

Courtesy of Wiki..."The origins of the Reuben are from Germany. One account holds that Reuben Kulakofsky a grocer from Omaha, Nebraska, was the inventor, perhaps as part of a group effort by members of Kulakofsky's weekly poker game held in the Blackstone Hotel from around 1920 through 1935. The participants, who nicknamed themselves "the committee," included the hotel's owner, Charles Schimmel. The sandwich first gained local fame when Schimmel put it on the Blackstone's lunch menu.

Other accounts hold that its creator was Arthur Reuben, owner of the once famous but now no longer existing Reuben's Delicatessen in New York, who, according to an interview with Craig Claiborne, invented the sandwich around 1914. A version of the story is related by Bernard Sobel in his book Broadway Heartbeat: Memoirs of a Press Agent and claims that the sandwich was an extemporaneous creation for Marjorie Rambeau inaugurated when the famed Broadway actress visited the Delicatessen one night when the cupboards were particularly bare."

Either way you spin it, it's a WICKED GOOD sandwich. Your typical Reuben consists of Corned beef, sauerkraut, Swiss cheese, Russian dressing or Thousand Island dressing and rye bread. I particularly LOVE pumpernickel bread, so if possible I try to get my Reuben on pump.

Around town, my favorite Reubens are from: Bluegrass Kitchen, First Watch and Penn Station (not in any particular order). Side note: First Watchs' website has some really 'feel good' audio. Back to the moment at hand.....Slim and I had an easy Sunday morning this past Sunday. We woke up fairly early, considering we were on 'the porch' until about 4 am whoop-n-it-up with the friends. We spent most of the day working on the house, however, we started the afternoon with a Reuben....excellent choice. This particular Sunday, we chose Penn Station for our Reuben location.

We ordered a 13" Reuben to split with Thousand Island and their fresh cut fries, complete with Malt Vinegar and Ranch for dipping.

By the way, I didn't know this B.C.S. (Before Culinary School) Thousand Island is: Mayo, Ketchup, Vinegar and Relish. I swear it tasted different before I knew that.

Anyhow....Penn Station has an AWESOME Reuben. Quite different from Bluegrass and Firstwatch (specifically because it's on a hoagie roll instead of Rye Bread).

Oh WOW, was it good....and messy, but oh so worth it. It was thoroughly enjoyed by both of us. Another successful Reuben Sunday!

E

Saturday, June 13, 2009

Greek Orzo Salad

Hello Folks! Welcome to my blog....thought I might try my hand at this. To be honest, I think I just need a place to post other than facebook. I like the idea of having "my stuff" in one place, rather than mish-mashed along with all of the other stuff.

I will use this blog as a place to show you what I'm up to, Chef-wise...which is my life and my love.

Without further adieu.....

Yesterday I made Orzo Salad. It's actually the second time I've made it, but this time I tweaked it. It was for my Sister-in-law's baby shower, and it was a HIT! In fact, the old church ladies made me write the recipe down, they made copies of it and passed it around the room. I felt very honored when one of them said, "I'm going to make this for church tomorrow." You know as well as I do, old ladies are funny about food. Not funny ha ha, more like funny - picky.

Here's the recipe:
1 lb of Orzo (cooked al dente')
1 Cucumber, diced
1 pint Cherry Tomatoes, sliced
3 Green Onions, sliced thin
1 8oz package of Feta Cheese, crumbled
1 package of Pine Nuts
3 T. Grey Poupon Dijon Mustard
1/4 c. White Wine Vinegar
1/4 c. Fresh Dill, Minced
1/2 c. Olive Oil

Combine: Cucumber, Tomatoes, Green Onions, Feta, Pine Nuts. Add Cooled Orzo and Fold. In a separate bowl, whisk the dijon, dill and vinegar together completely.
Drizzle the olive oil slowly while continuing to whisk. Pour over the Salad and mix, chill.

And since I am a Student Chef, thought I might use this blog to lay some knowledge.

The term for what happens when you drizzle that Olive Oil into the Vinegar/Mustard/Dill mixture is EMULSION. Emulsion, as you may recall from Chemistry, is defined as a mixture of two liquids that would not normally mix or a mixture of two immiscible liquids. An emulsion contains tiny particles of one liquid suspended in another.

A classic example of an emulsion is oil and water when mixed slowly (by drizzling) under vigorous stirring. However, when the agitation is stopped, the two liquids separate and the emulsion breaks down. This is an example of an "unstable emulsion".

Stable emulsions can be formed from two immiscible liquids when an emulsifier or an emulsifying agent is used. In this case, the emulsifying agent is the Dijon Mustard. Other examples of emulsifying agents are egg yolks and honey. Both Mayonnaise and Hollandaise Sauce are oil-in-water emulsions that are stabilized with egg yolk.

That's all for my first blog, I hope you enjoy!

E